Building a water tank sensor using ESP32, JSN SR04T sensor, Mongoose OS and AWS IoT
There’ll be quite a lot going on in this post, I’ve had a crash course in Mongoose OS the past few weeks so this serves as a brain dump!
The goal
To create a low powered, wifi enabled device that I can install under the access hatch in my rainwater tank, that will periodically take readings of the water level via an ultrasonic sensor and report that data to AWS IoT.
With no IoT experience, I was inspired by a colleague at work who has also done this, I thought it’d be a good way to get stuck in and learn something! I wrote a previous post about getting started with Mongoose OS
Wiring things up
First things first, the JSN SR04T sensor that I’m using here is the waterproof equivalent of the HC SR04, I didn’t realise this at first, but it’ll help you find resources easier knowing the interfaces are the same. One thing to note is that the HC SR04 will be able to take measurements at closer distances than the JSN SR04, this is because the HC SR04 has separate transmitter and receiver modules, whereas the JSN SR04 is a combined unit, and there is a delay in switching from the transmit to the receive signals, so it can’t read below about 20cm.
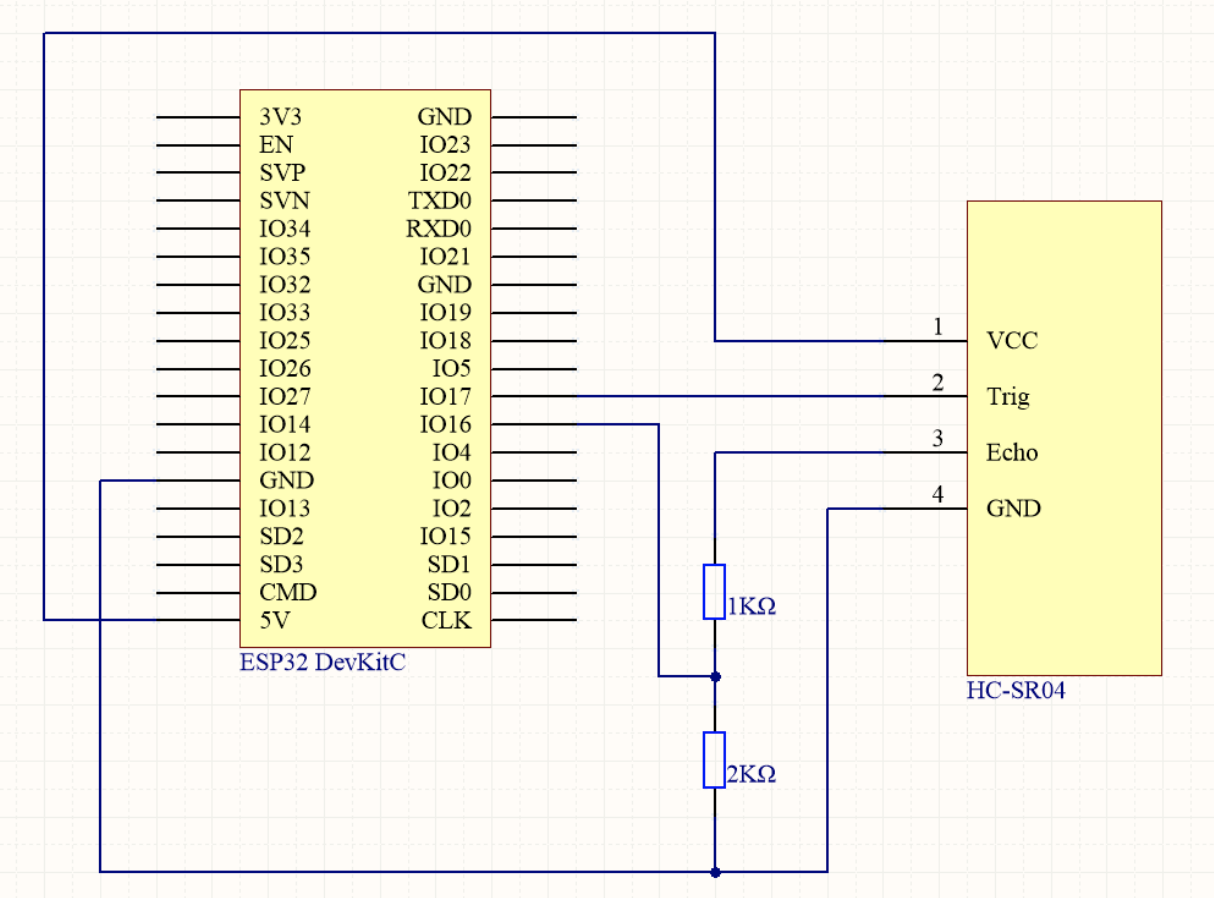
The sensor operates on 5v, which is great as the ESP32 has a 5v out, but we need to convert that down to 3.3v on the input (echo) as the ESP32 operates at 3.3v.
Kolbans’ ESP32 book has a wiring diagram for this, here’s a screenshot (also go check out the book and send him a few $, well worth it!)
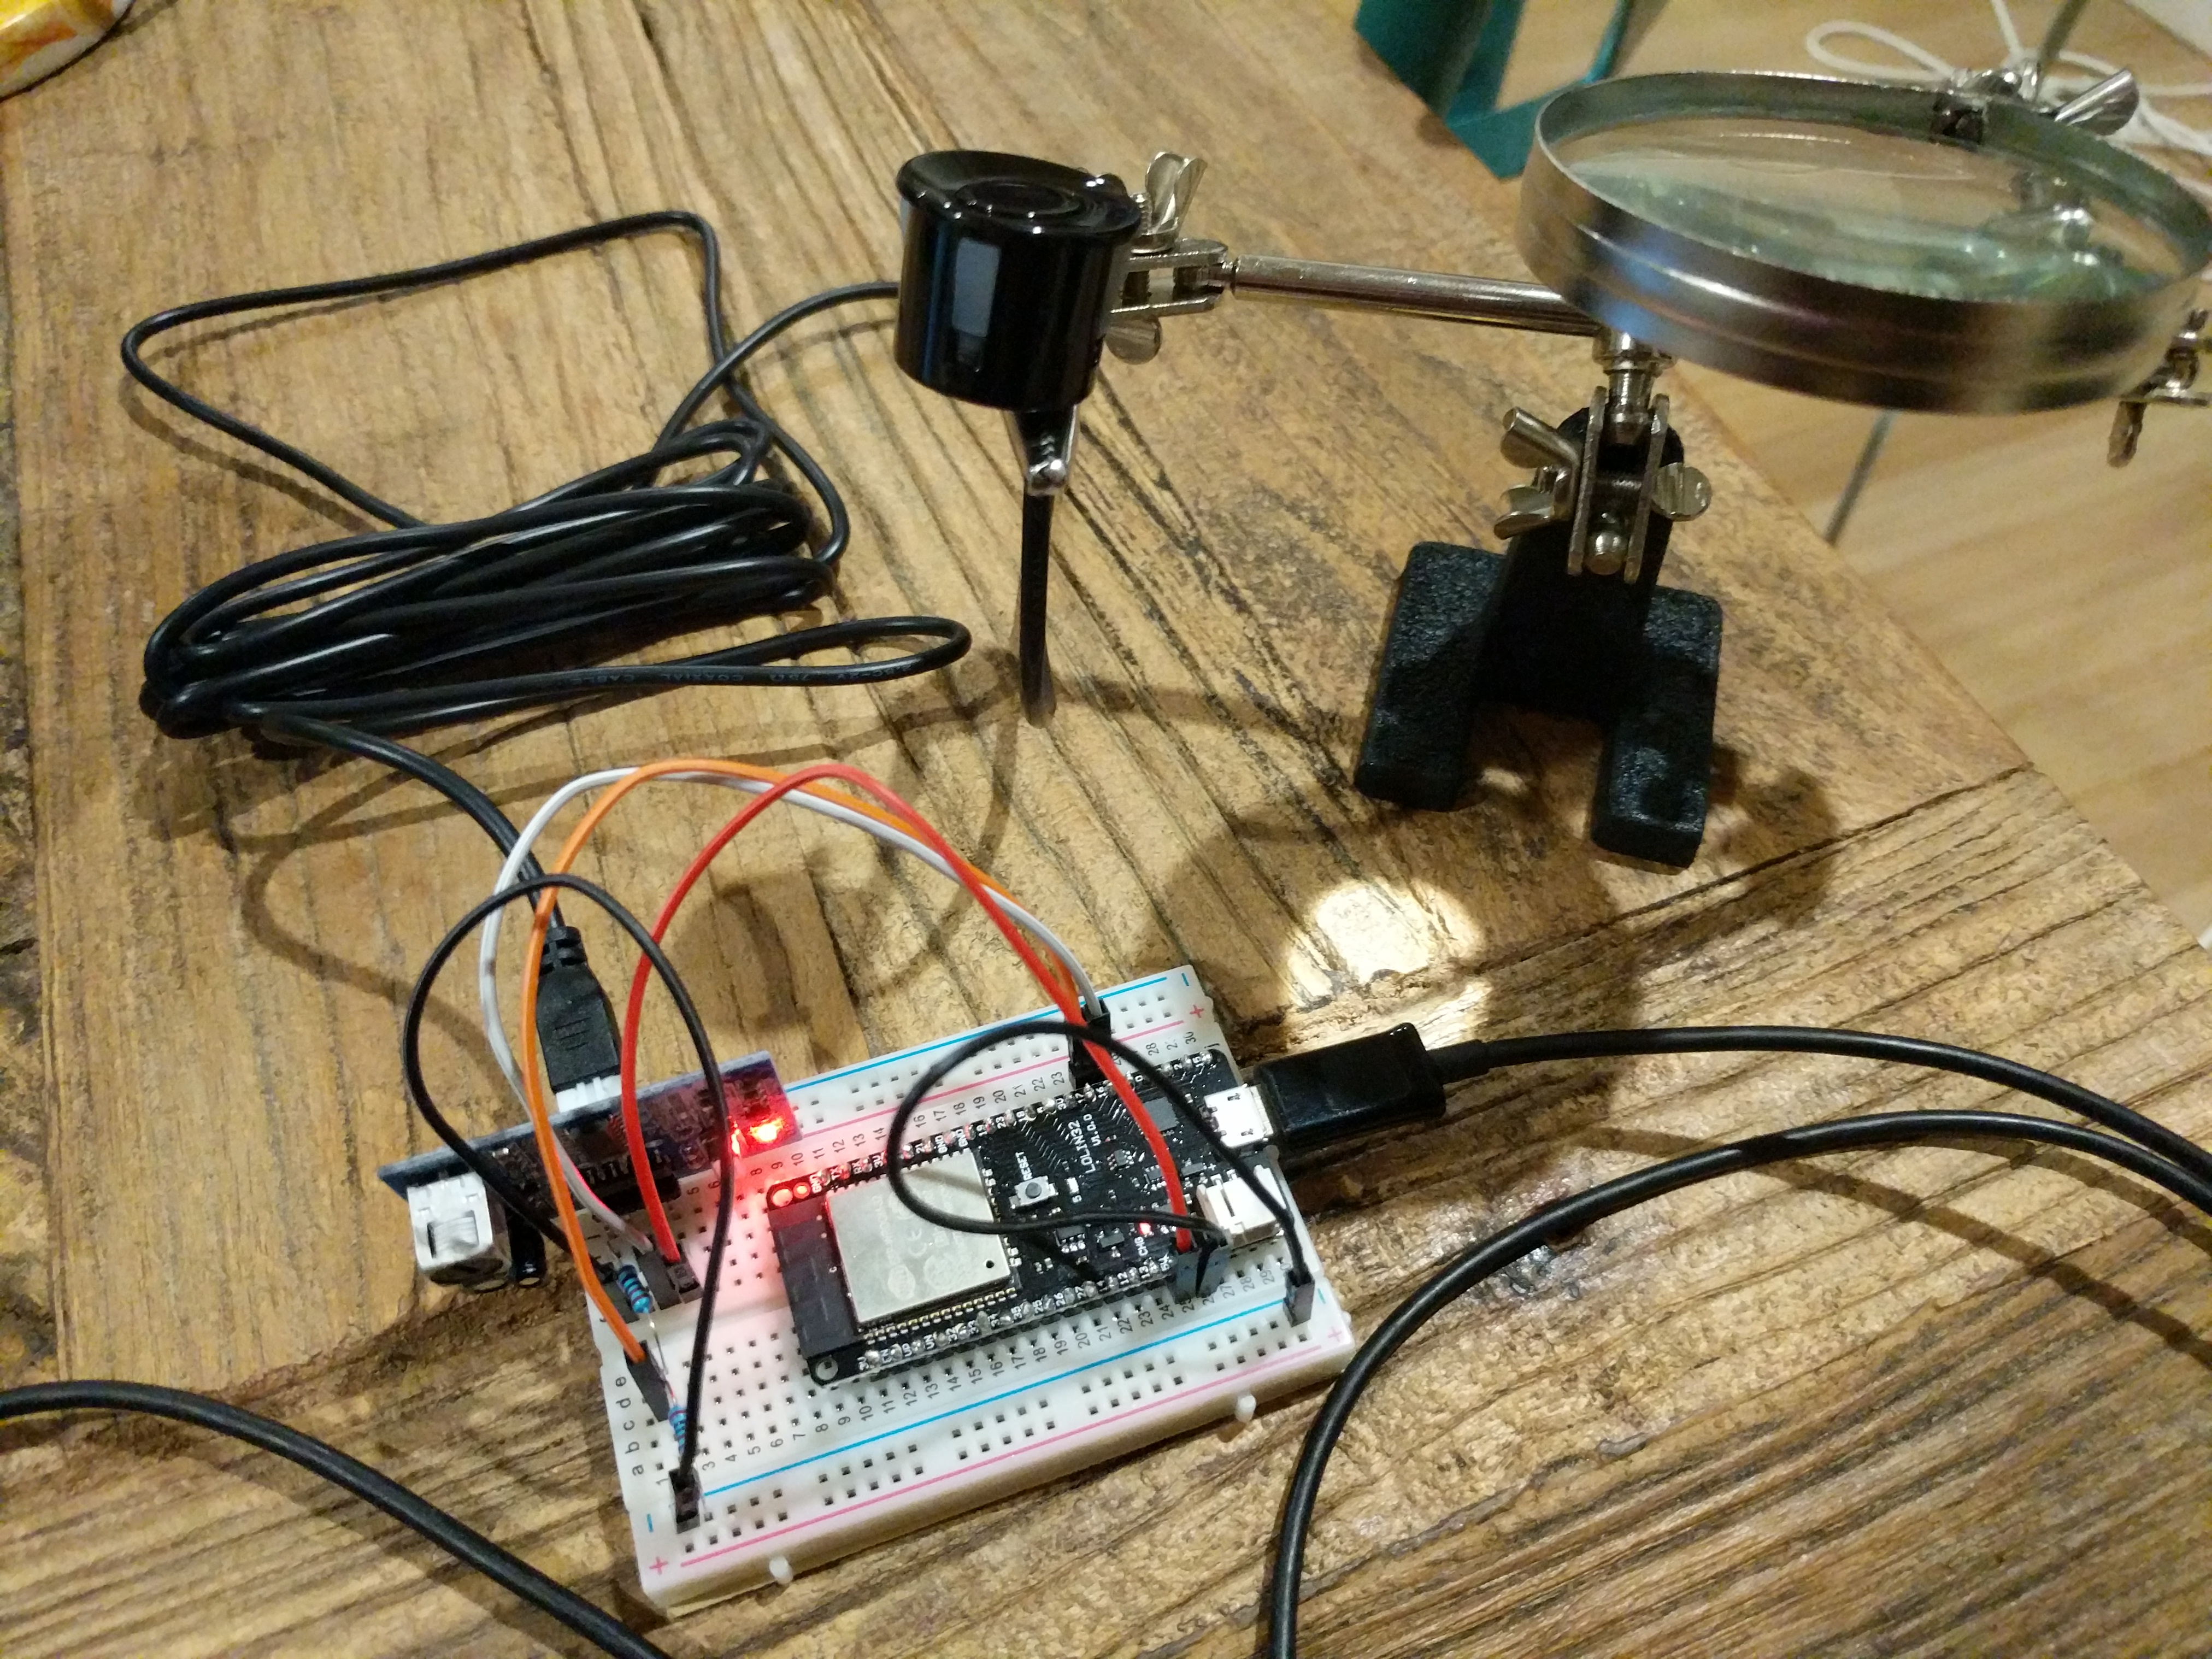
 I’m using a breadboard and jumper cables to make it easier, it’s not pretty but it does the job!
 ESP32 setup with JSN SR04 using a breadboard. The helping hand is just there to hold the sensor. Interacting with the sensor
There are plenty of examples of how to use this sensor using Arduino, but I couldn’t find any for using Mongoose OS. I initially tried to use the Mongoose OS Arduino compatibility library, but unfortunately it wasn’t just a case of dropping in some Arduino code and it working as others have suggested, because there are certain Arduino functions that need to be wrapped in Mongoose OS (like pulseIn).
Thankfully the kind souls over on the Mongoose OS forums were able to help me with a pulseIn implementation so I could read the sensor data!
Interacting with the sensor is simple, signal the trigger pin for at least 10 microseconds, then read the duration of a signal from the echo pin. The duration is the time it took for the ultrasound signal to return.
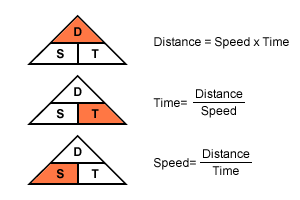
Casting our minds back to Maths class all those years ago, with time (duration of the signal) and speed (constant of sound) we can calculate distance. Remember the pyramid? Heres an image from the BBC Maths website to jog your memory

unsigned long duration = pulseInLongLocal(ECHO_PIN, 1, TIMEOUT);
double distance = duration * 0.034 / 2;
The divide by 2 is because the duration caters for the send and receive, we only want 1 way.
Here’s the full source code, however please don’t rely on this page, I’ve likely updated the code since posting this so checkout the project on Github
#include <stdio.h>
#include "mgos.h"
#include "mgos_app.h"
#include "mgos_gpio.h"
#include "mgos_timers.h"
#include "mgos_mqtt.h"
#include "mgos_config.h"
// as pulseIn isn't supported in Mongoose Arduino compatability library yet, here's a local
// implementation of that. Full credit to "nliviu" on Mongoose OS forums for that
// https://forum.mongoose-os.com/discussion/1928/arduino-compat-lib-implicit-declaration-of-function-pulsein#latest
static inline uint64_t uptime()
{
return (uint64_t)(1000000 * mgos_uptime());
}
uint32_t pulseInLongLocal(uint8_t pin, uint8_t state, uint32_t timeout)
{
uint64_t startMicros = uptime();
// wait for any previous pulse to end
while (state == mgos_gpio_read(pin))
{
if ((uptime() - startMicros) > timeout)
{
return 0;
}
}
// wait for the pulse to start
while (state != mgos_gpio_read(pin))
{
if ((uptime() - startMicros) > timeout)
{
return 0;
}
}
uint64_t start = uptime();
// wait for the pulse to stop
while (state == mgos_gpio_read(pin))
{
if ((uptime() - startMicros) > timeout)
{
return 0;
}
}
return (uint32_t)(uptime() - start);
}
static void timer_cb(void *arg)
{
//send trigger
mgos_gpio_write(mgos_sys_config_get_app_gpio_trigger_pin(), 1);
// wait 10 microseconds
mgos_usleep(10);
// stop the trigger
mgos_gpio_write(mgos_sys_config_get_app_gpio_trigger_pin(), 0);
// wait for response and calculate distance
unsigned long duration = pulseInLongLocal(mgos_sys_config_get_app_gpio_echo_pin(), 1, mgos_sys_config_get_app_pulse_in_timeout_usecs());
double distance = duration * 0.034 / 2;
char strBuffer[64];
snprintf(strBuffer, sizeof(strBuffer), "{\"report\":{\"distance\":%.2f}}\n", distance);
printf(strBuffer);
mgos_mqtt_pub(mgos_sys_config_get_app_mqtt_tank_level_topic(), strBuffer, strlen(strBuffer), 1, 0);
(void)arg;
}
enum mgos_app_init_result mgos_app_init(void)
{
// set the modes for the pins
mgos_gpio_set_mode(mgos_sys_config_get_app_gpio_trigger_pin(), MGOS_GPIO_MODE_OUTPUT);
mgos_gpio_set_mode(mgos_sys_config_get_app_gpio_echo_pin(), MGOS_GPIO_MODE_INPUT);
mgos_gpio_set_pull(mgos_sys_config_get_app_gpio_echo_pin(), MGOS_GPIO_PULL_UP);
// Every x second, invoke timer_cb. 2nd arg means repeat continuously
mgos_set_timer(mgos_sys_config_get_app_sensor_read_interval_ms(), true, timer_cb, NULL);
return MGOS_APP_INIT_SUCCESS;
}
Sending data to AWS
Sending the actual data to AWS was easy, it was just a case of calling the MQTT publish function like so
mgos_mqtt_pub(mgos_sys_config_get_app_mqtt_tank_level_topic(), strBuffer, strlen(strBuffer), 1, 0);
I’ve chosen to send the data as JSON as it’ll be easier for me to do something with it later on.
The hardest part was understanding how the config works on Mongoose OS, I’ll have to do another post about that, but just remember that after flashing the device, it loses any previous configuration such as AWS config. So if you flash, you need to run this again.
mos build; mos flash
mos aws-iot-setup
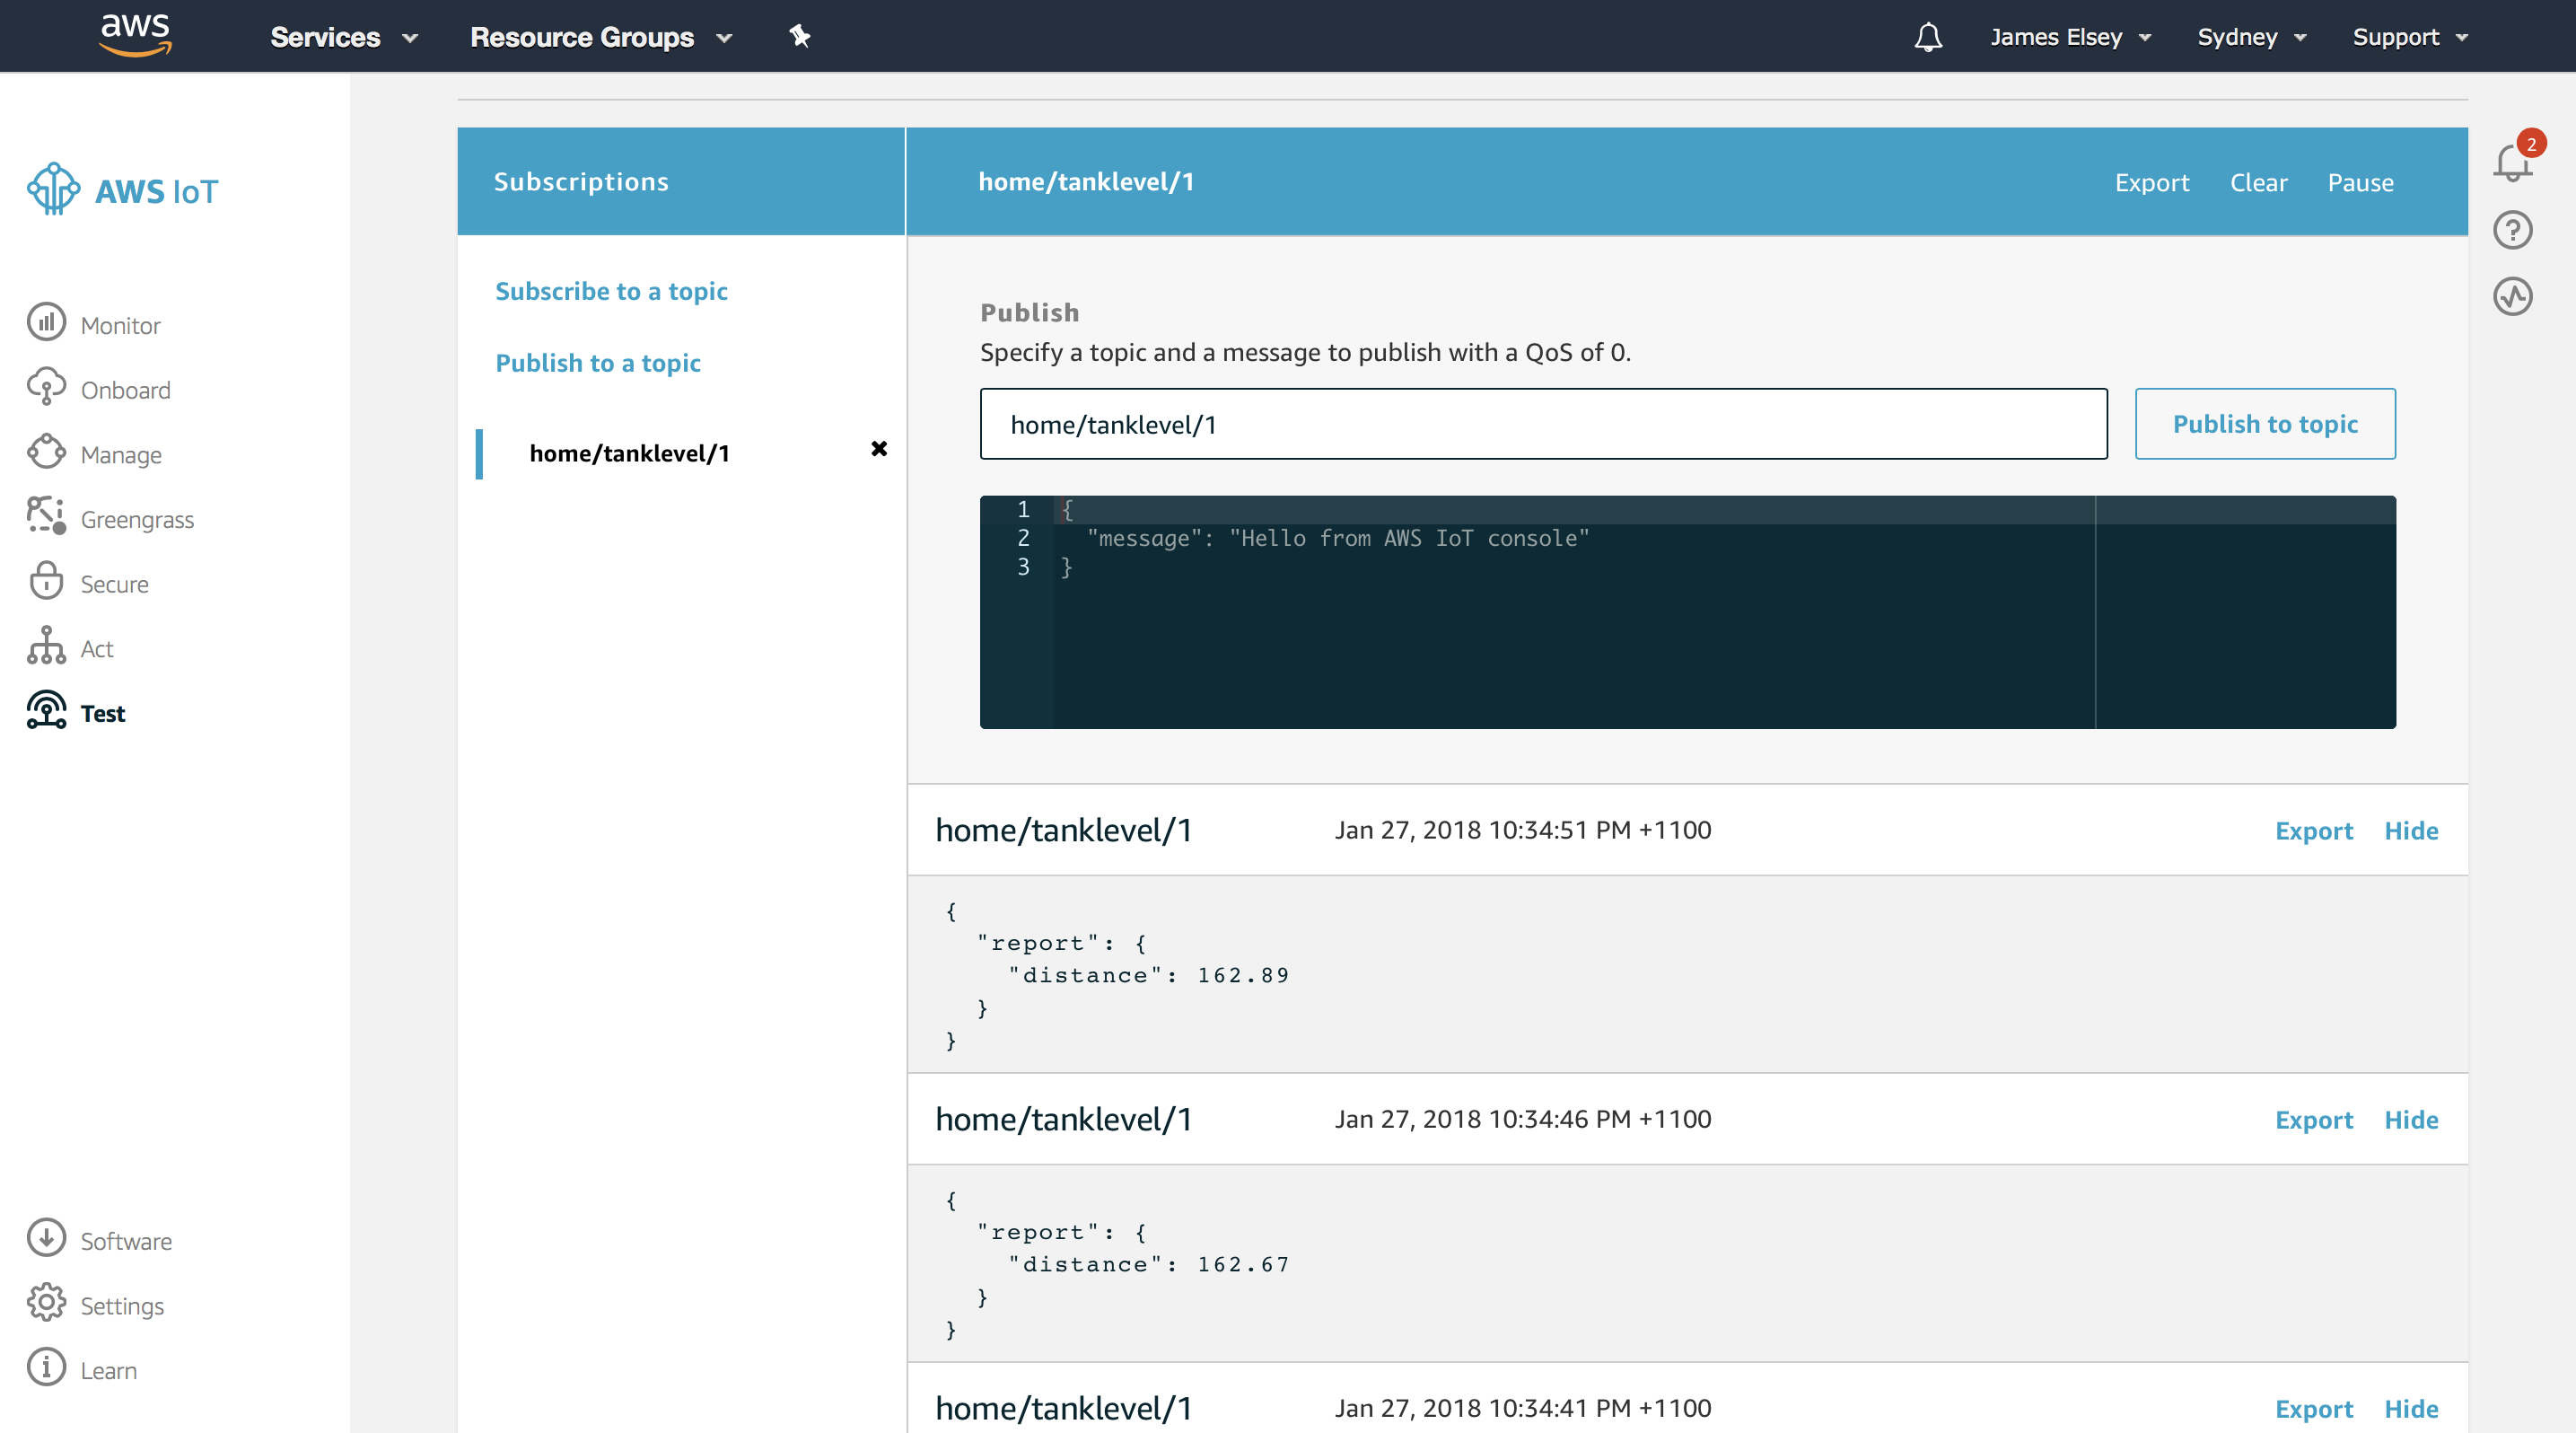
Then head over to the AWS console and test this by subscribing to the topic, you should see something like this

If your device appears to be working, but nothing is making it to the AWS console, check you haven’t blown away the AWS keys after a flash, run “mos ls”, then “mos aws-iot-setup” if theres no AWS pem/key files on the device.
Conclusion
As stated by the Mongoose OS team, it’s really easy to get started with an ESP32 device and AWS IoT. It took me about 2-3 hours getting the AWS IoT working, but admittedly most of that was lost understanding config injection in Mongoose OS, and drinking beer (it is a Saturday night after all).